Introducing WEXAL® Reverse Proxy Limited Edition
Initial Setup
When you access to the instance (IP address) with your browser, you will be redirected to the setup page.
(e.g., if you access "http://10.0.1.1" you will be redirected to "http://10.0.1.1:61000/setup.php")
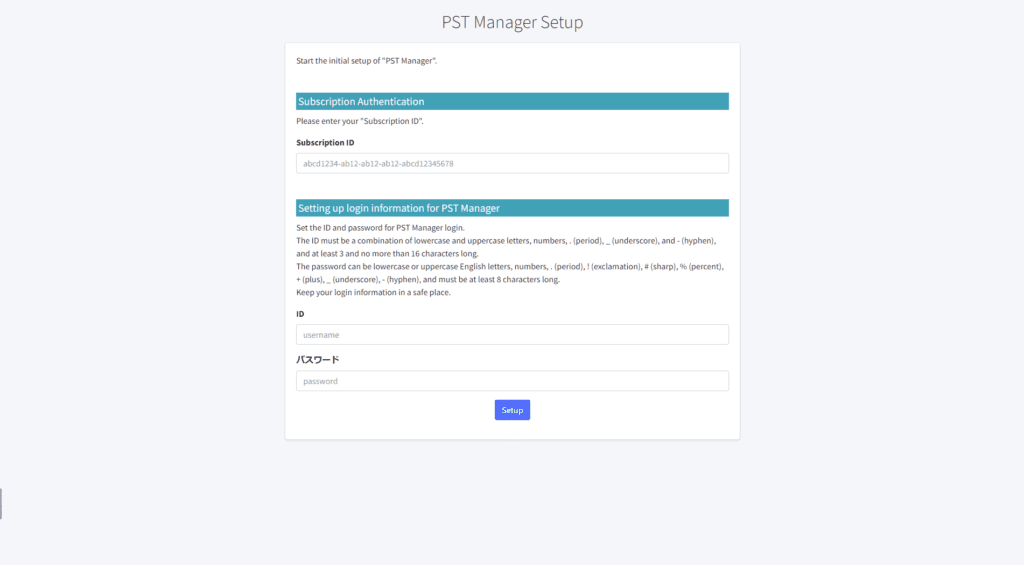
Enter the following initial setup items and click the "Setup" button.
Subscription Authentication
Enter the subscription ID.
Setting-up Login Information for WEXAL® PST Manager
Set the ID and password for login to WEXAL® PST Manager. Characters that can be used are alphanumeric characters, hyphens, and underscores.
Keep your login information in a safe place.
* To reset your ID and password, use the "passwd" command.
Provisioning
When Basic Authentication appears, enter the ID and password from the setup page. After you have logged in, the provisioning page will appear.
You can configure the reverse proxy server settings on this page.
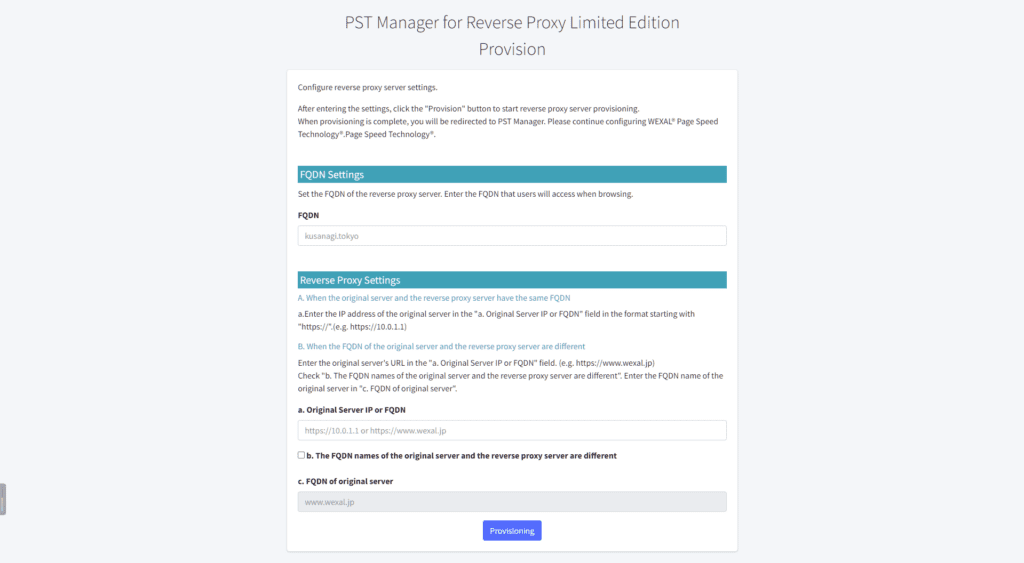
FQDN Settings
Set the FQDN of the reverse proxy server. Enter the FQDN that users will access when browsing.
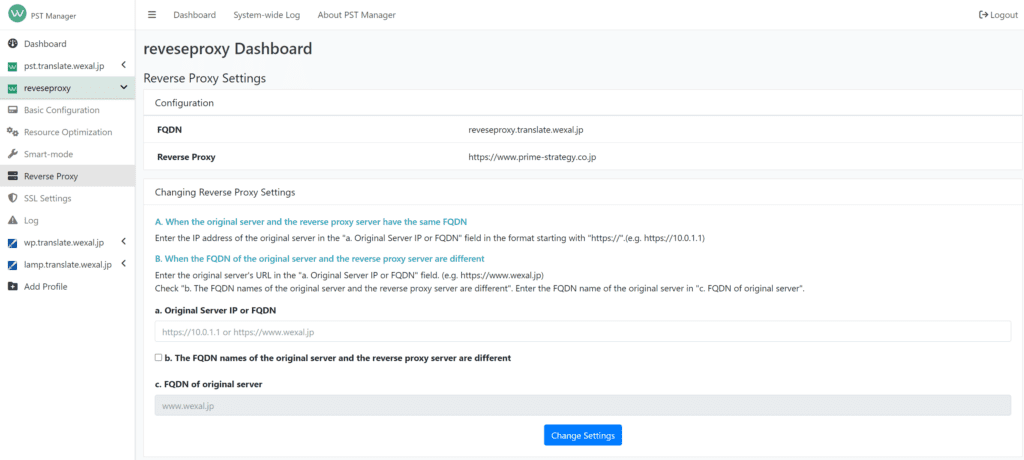
Reverse Proxy Settings
Configure the reverse proxy settings.
The configuration settings differ depending on the combination of the FQDN of the original server and the reverse proxy server. Check which pattern applies, A or B below, before proceeding with the configuration.
A. When the original server and the reverse proxy server have the same FQDN
B. When the original server and the reverse proxy server have a different FQDN
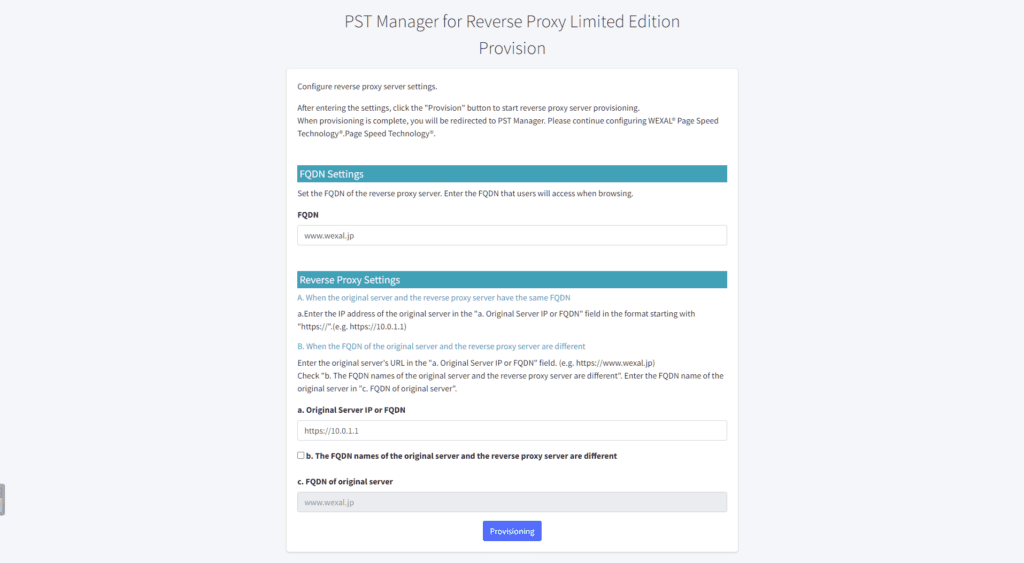
A. When the original server and the reverse proxy server have the same FQDN
Enter the IP address of the original server in the "a. Original Server IP or FQDN" field in a format starting with "https://".
(e.g. https://10.0.1.1)
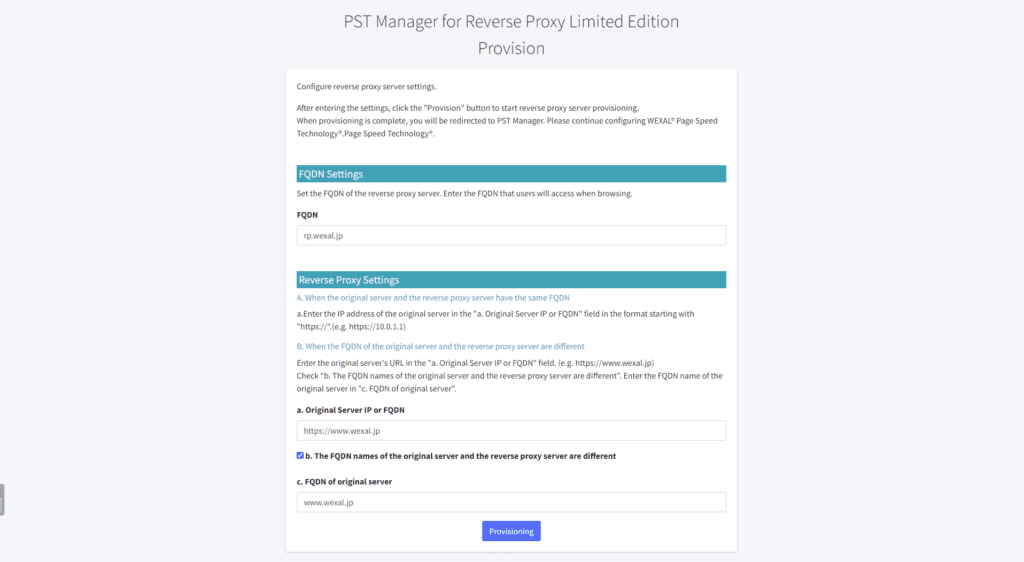
B. When the original server and the reverse proxy server have a different FQDN
- Enter the original server's URL in the "a. Original Server IP or FQDN" field. (e.g. https://www.wexal.jp)
- Check "b. The original server and the reverse proxy server have a different FQDN".
- Enter the FQDN name of the original server in "c. FQDN of the original server".
Provisioning
After entering the information, click the "Provision" button to start reverse proxy server provisioning. When provisioning is completed, you will be redirected to WEXAL® PST Manager.
* A loading symbol during the provisioning process will be displayed on the "Provision" button. Although it may take time, please wait for completion before transitioning or reloading the page.
SSL Settings
Go to the SSL Settings page of WEXAL® PST Manager and set the SSL certificate for the reverse proxy server.
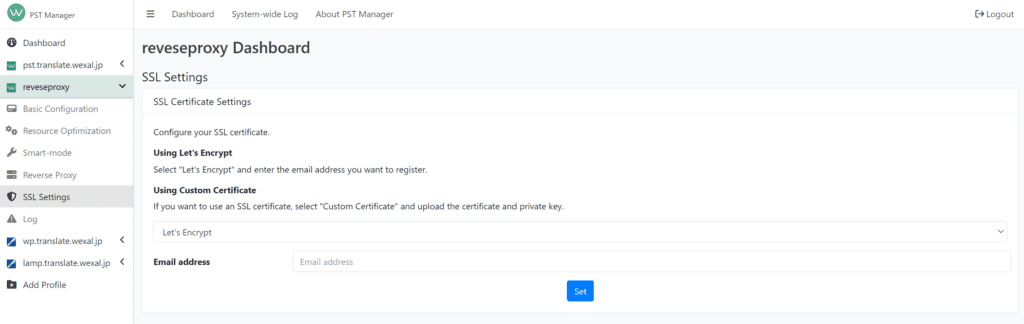
When Using "Let's Encrypt"
Select "Let's Encrypt" and enter the email address you want to register.
When Using a Custom Certificate
Select "Custom Certificate" and upload your certificate and private key.
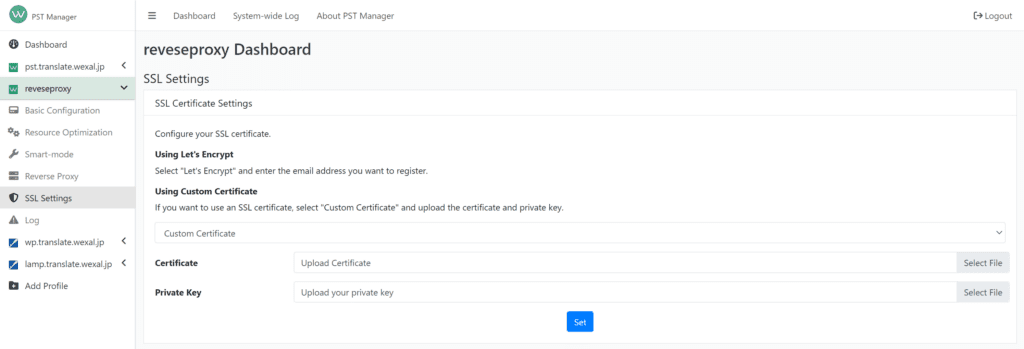
Applying a Certificate
After completing all the necessary information, click the "Set" button to apply to the certificate.
Renewing a Certificate
You can renew a certificate on this page using the same procedure.
PST Configurations
You are now ready to use a reverse proxy server. Refer to the following document to configure the PST settings.
- Enabling PST" under WEXAL® "Procedures for Getting Started in PST Manager (First Steps)
- WEXAL® PST Manager Manual
Changing Reverse Proxy Settings
To change the reverse proxy settings, use the Reverse Proxy Settings page of WEXAL® PST Manager.
The setting items are almost the same as those on the provisioning page, but note the following points.
- In WEXAL® PST Manager, you cannot change the FQDN of the reverse proxy server itself.
- After changing the reverse proxy settings, SSL must be configured again. Set the SSL certificate again on the SSL Settings page of WEXAL® PST Manager.

